Chat is a great way to communicate with users and guests in real-time. With chat, you can create dedicated channels so different departments can communicate with relevant participants and not be overwhelmed by irrelevant messages within an overly crowded “party line” style format. Conversely, if you want a party line channel, you can absolutely create one!
Opening Chat #
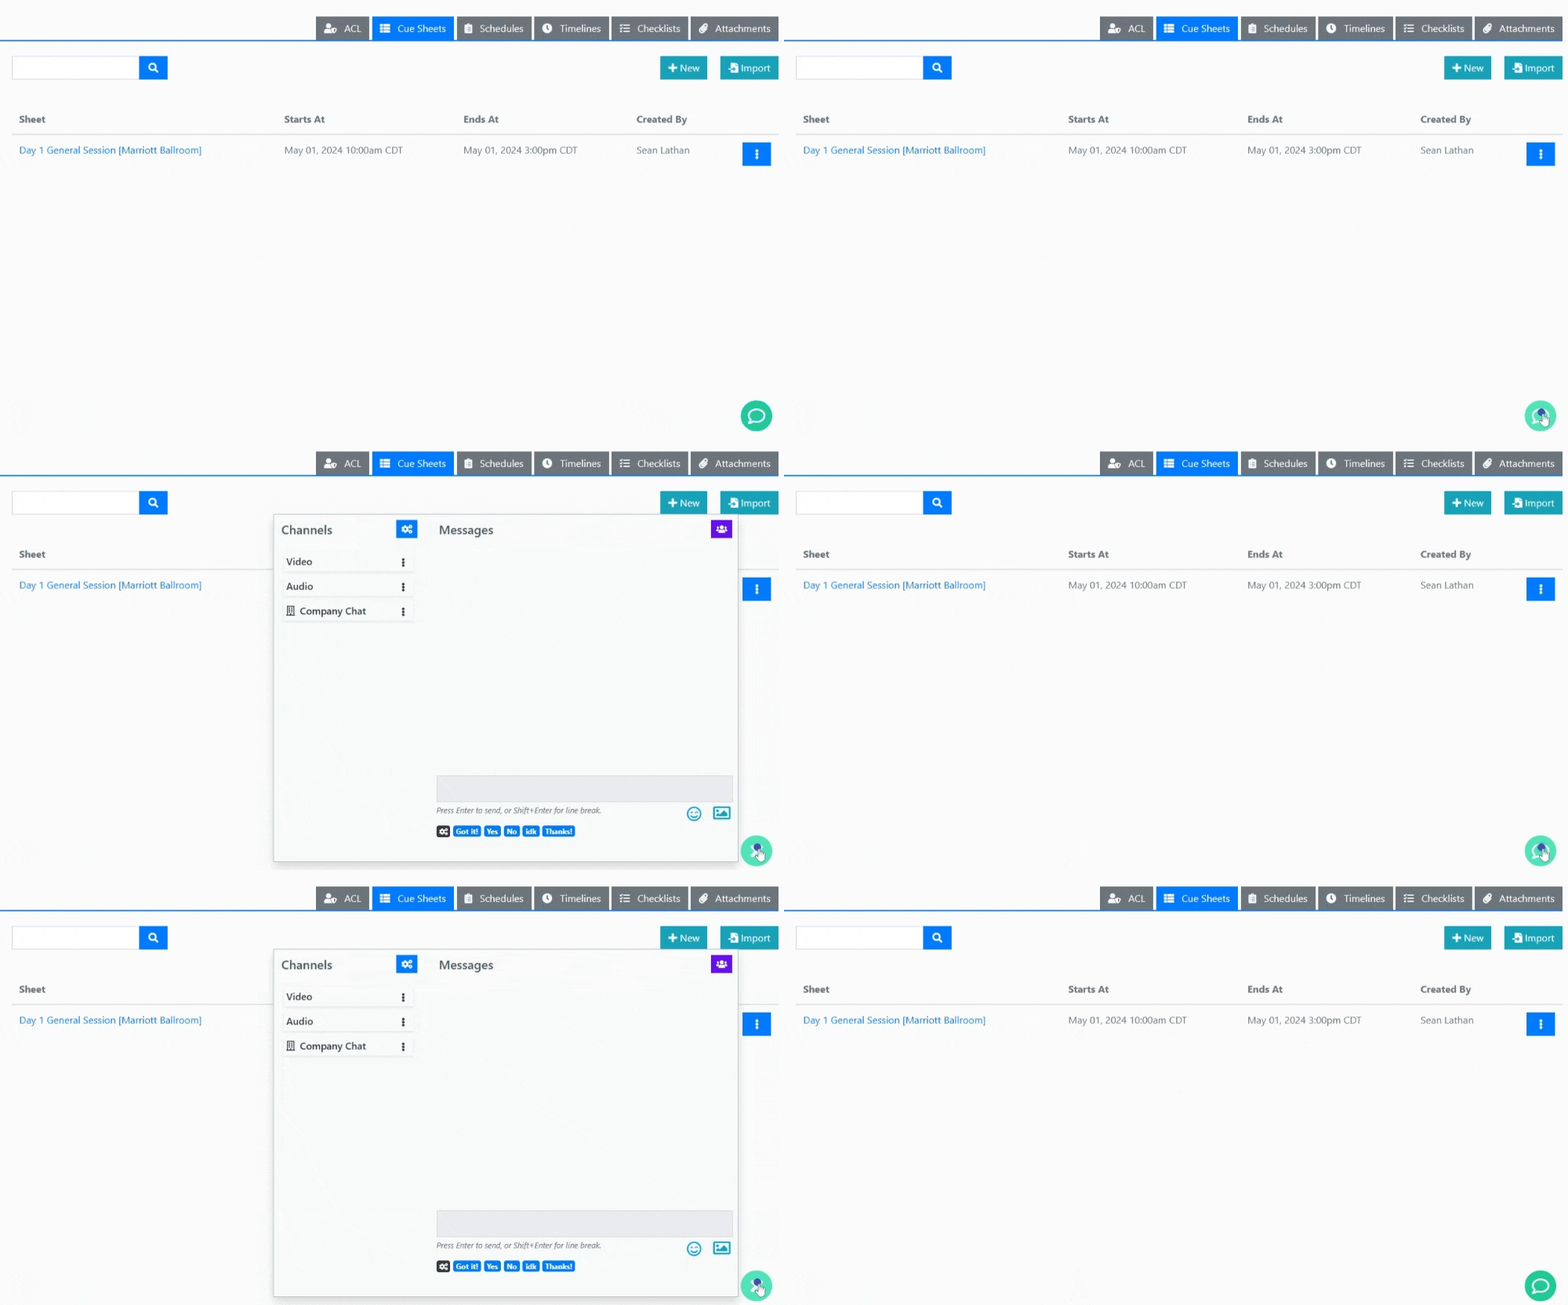
Chat can be opened by clicking the teal chat bubble in the lower right corner of the screen.
Channels #
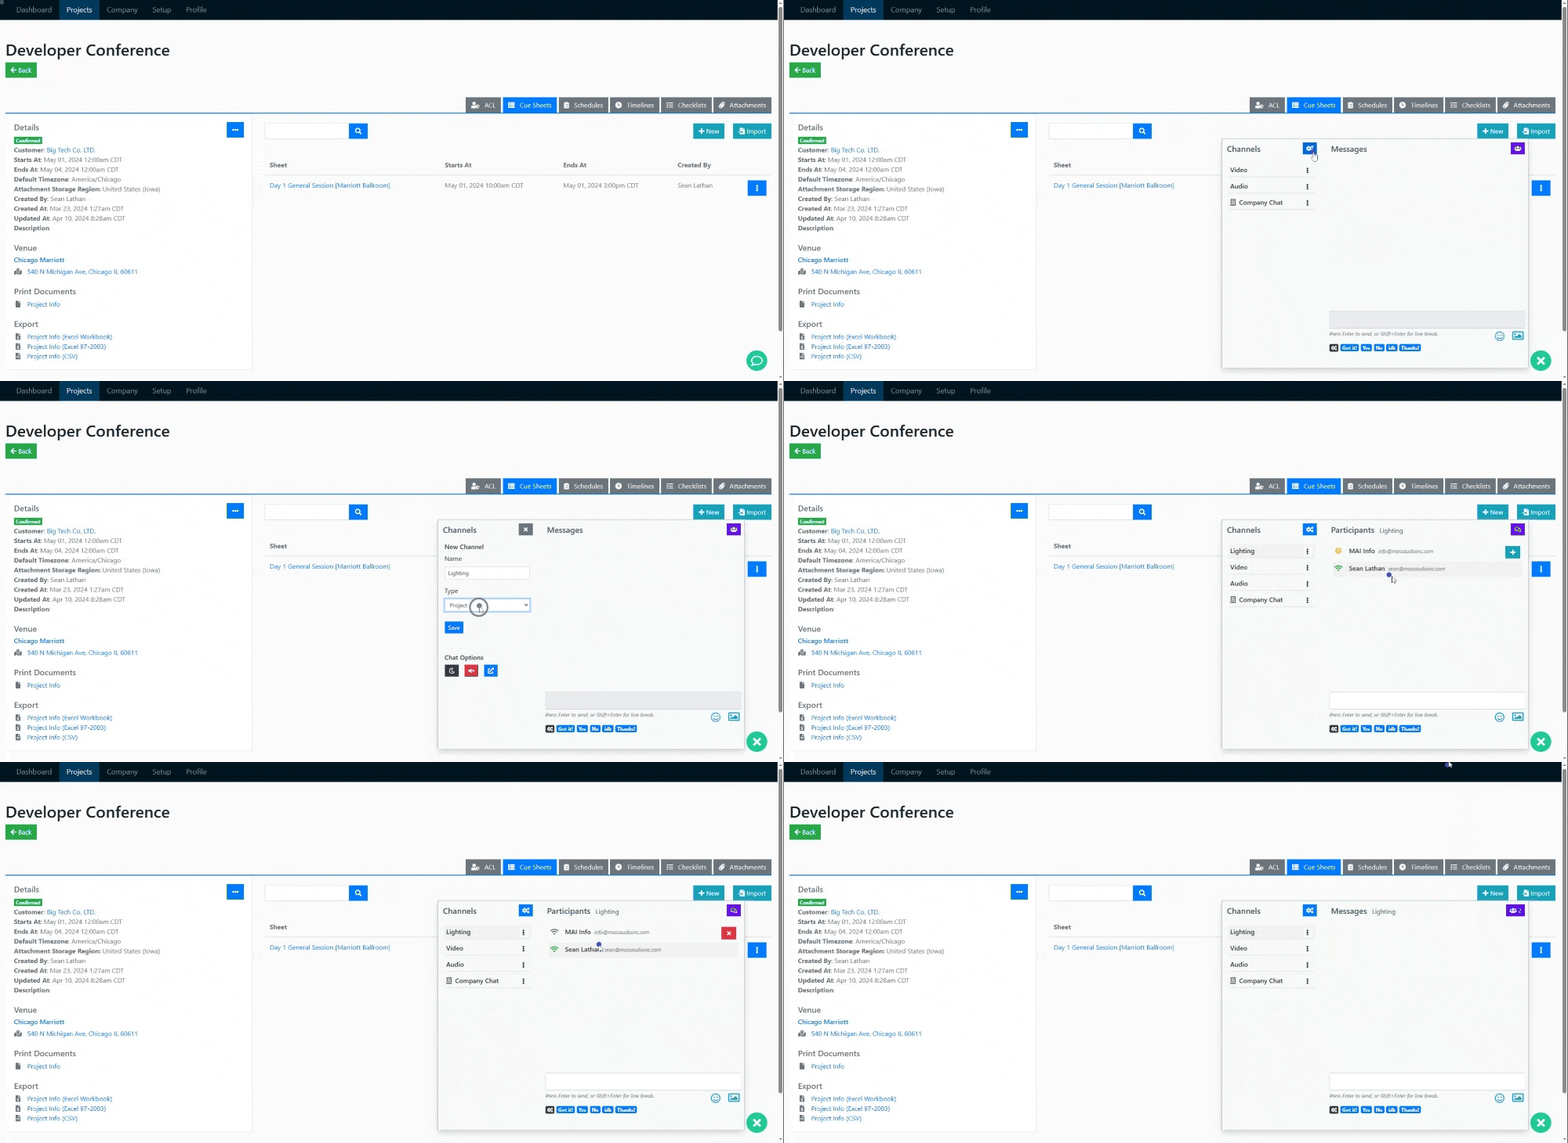
Channels represent a dedicated place for a department or group of people to communicate. Within each channel, you can add participants to limit who has access to the channel’s messages.
There are 2 different types of channels, company channels, and project channels. A company channel allows your internal staff to communicate with each other, and these channels are available throughout the system. A project channel is only viewable within a specific project and is not viewable in other areas of the system. This allows you to keep project specific communications organized while also allowing staff members within your company to have general communication channels across all projects.
Participants #
Participants are the users and guests that are able to view and send messages within a channel.
In company channels you are able to add your internal users, while in a project channel you are able to add internal users as well as any guests within the project ACL.
Adding and removing participants can be done by selecting the + or x button next to a user or guest as seen in for GIF above.
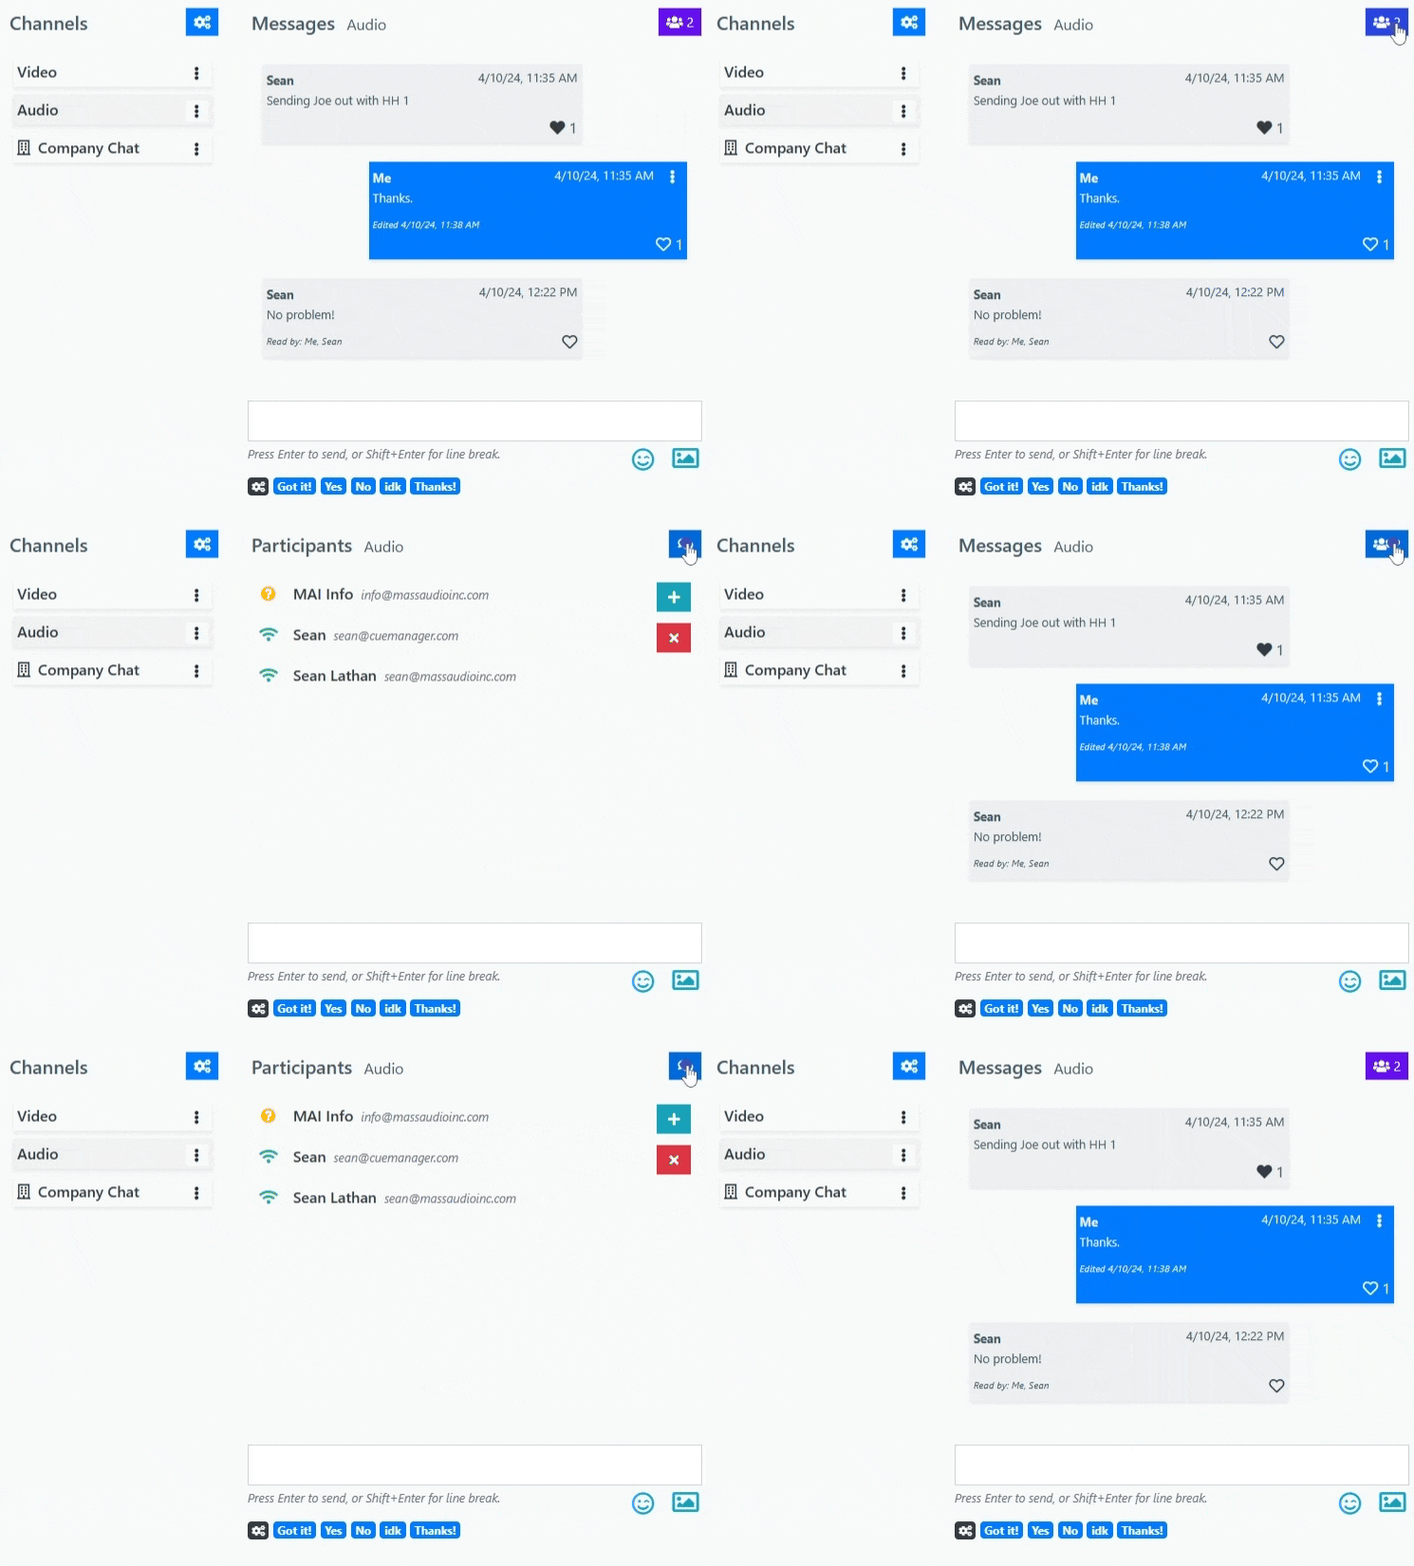
Viewing participants can be done by clicking the indigo people icon in the upper right corner of the chat popover.
Messages #
To send a message, simply select the channel, type something into the textbox located under the messages pane and press the enter key. Simple as that!
If you would like to separate text by lines, hold down shift key and press enter to create a line break.
To edit a previously sent message, click the option dots in the upper right corner of the message and select Edit. An edit timestamp will appear under the message to let others know the message was edited.
To delete a message, click the option dots in the upper right corner of the message and select Delete.
Reactions #
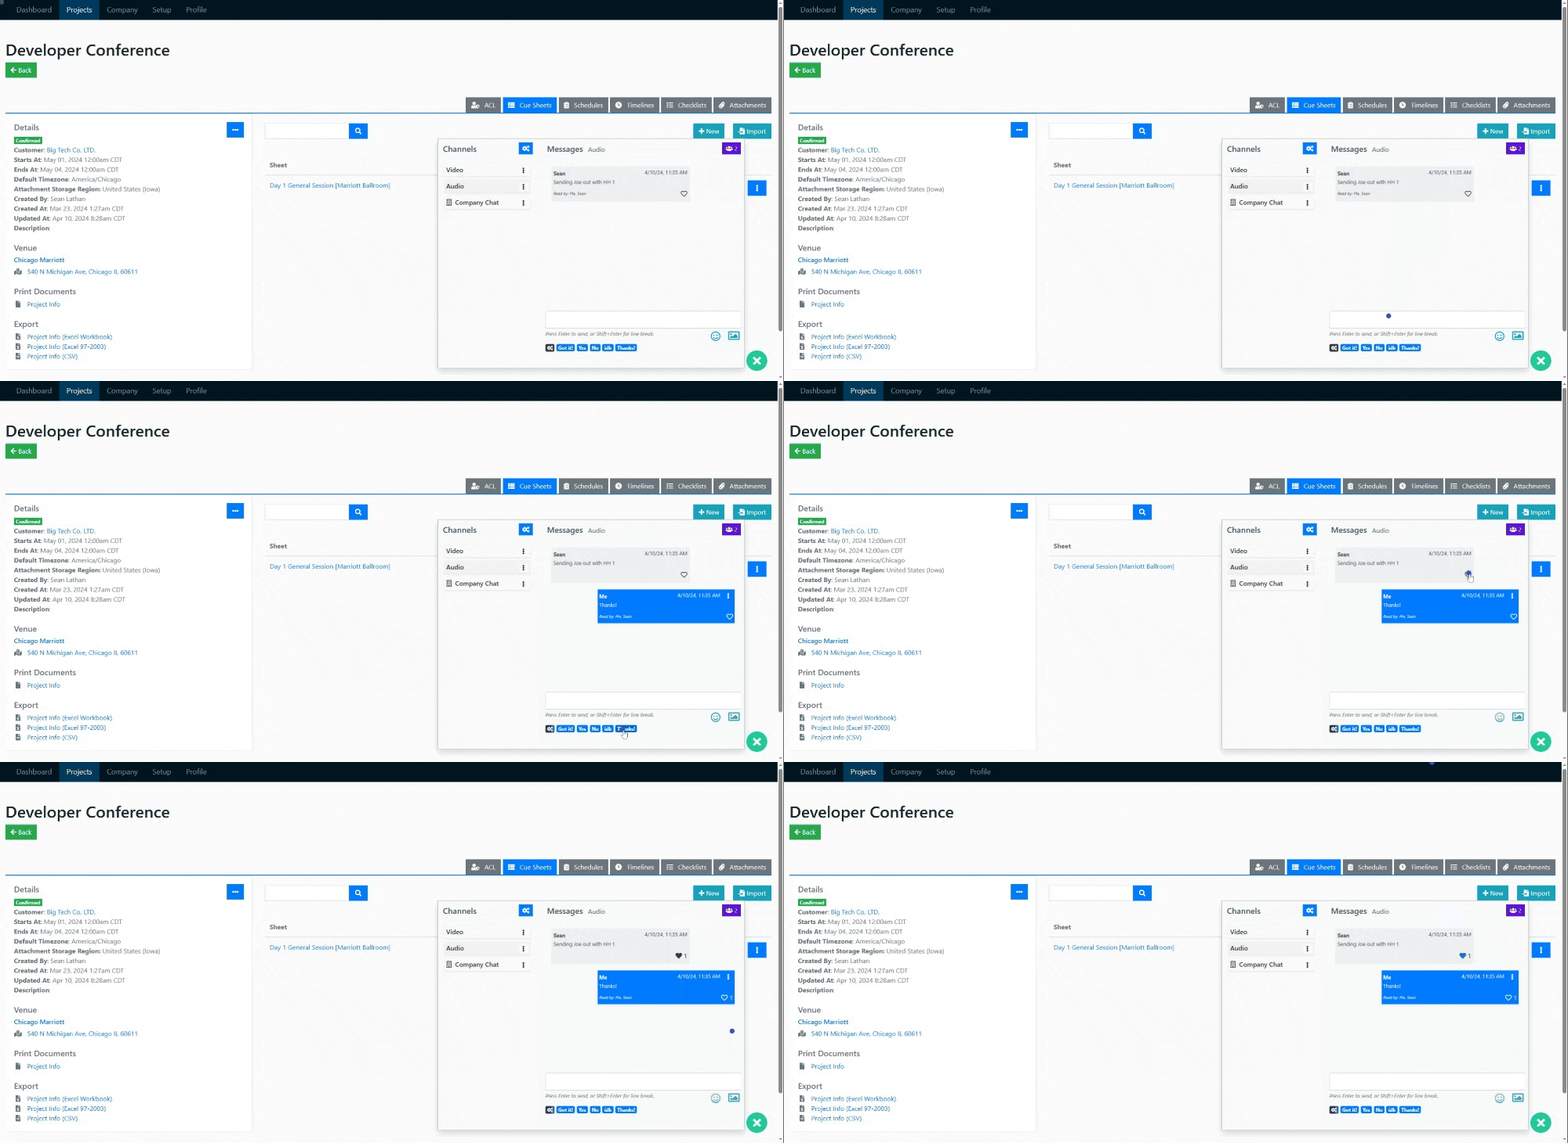
Want to react to a message? You can! Simply click on the heart icon located in the lower right corner of a message. You can also mouse-over it to see who else has liked it.
Read & Typing Receipts #
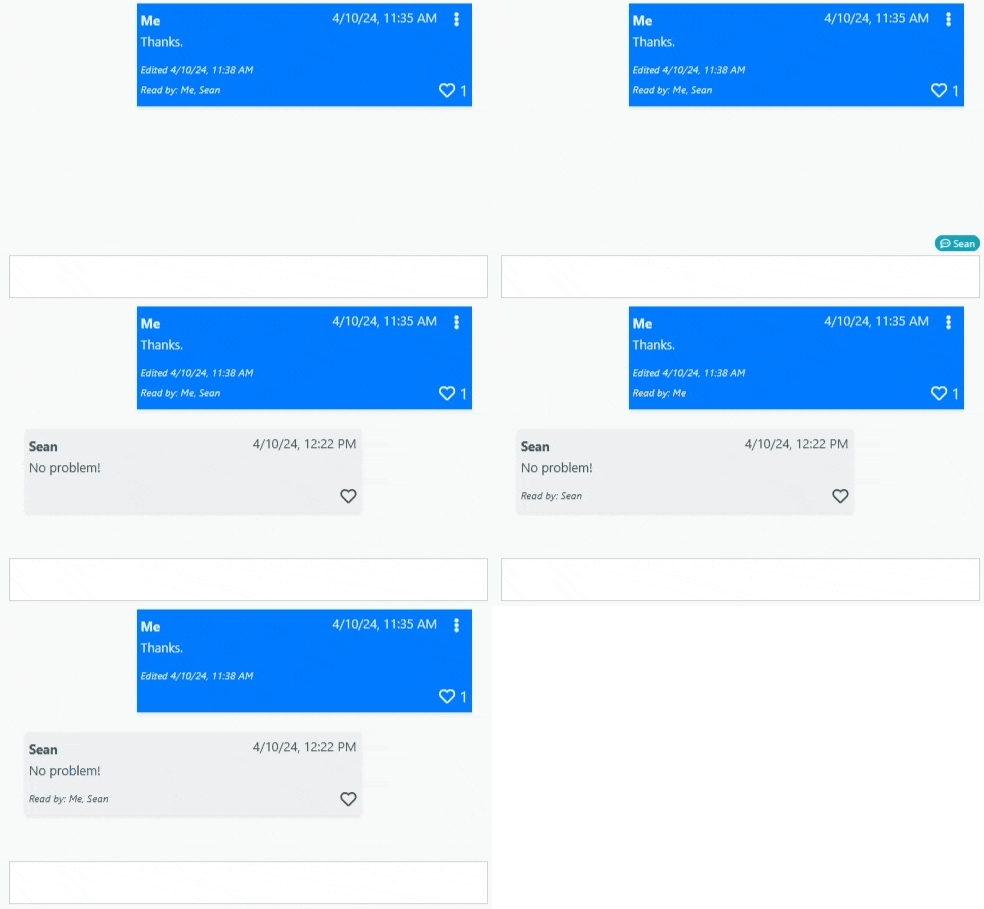
Want to know who has seen a message and if they are about to respond? Simply check the lower left corner of each message to see a list of users who have read it. The most recent message each user has read will have their name in the list.
You can also see if anyone is currently typing by looking directly above the message textbox. An aqua bubble will appear with the name of whoever is typing.
New Message Notifications #
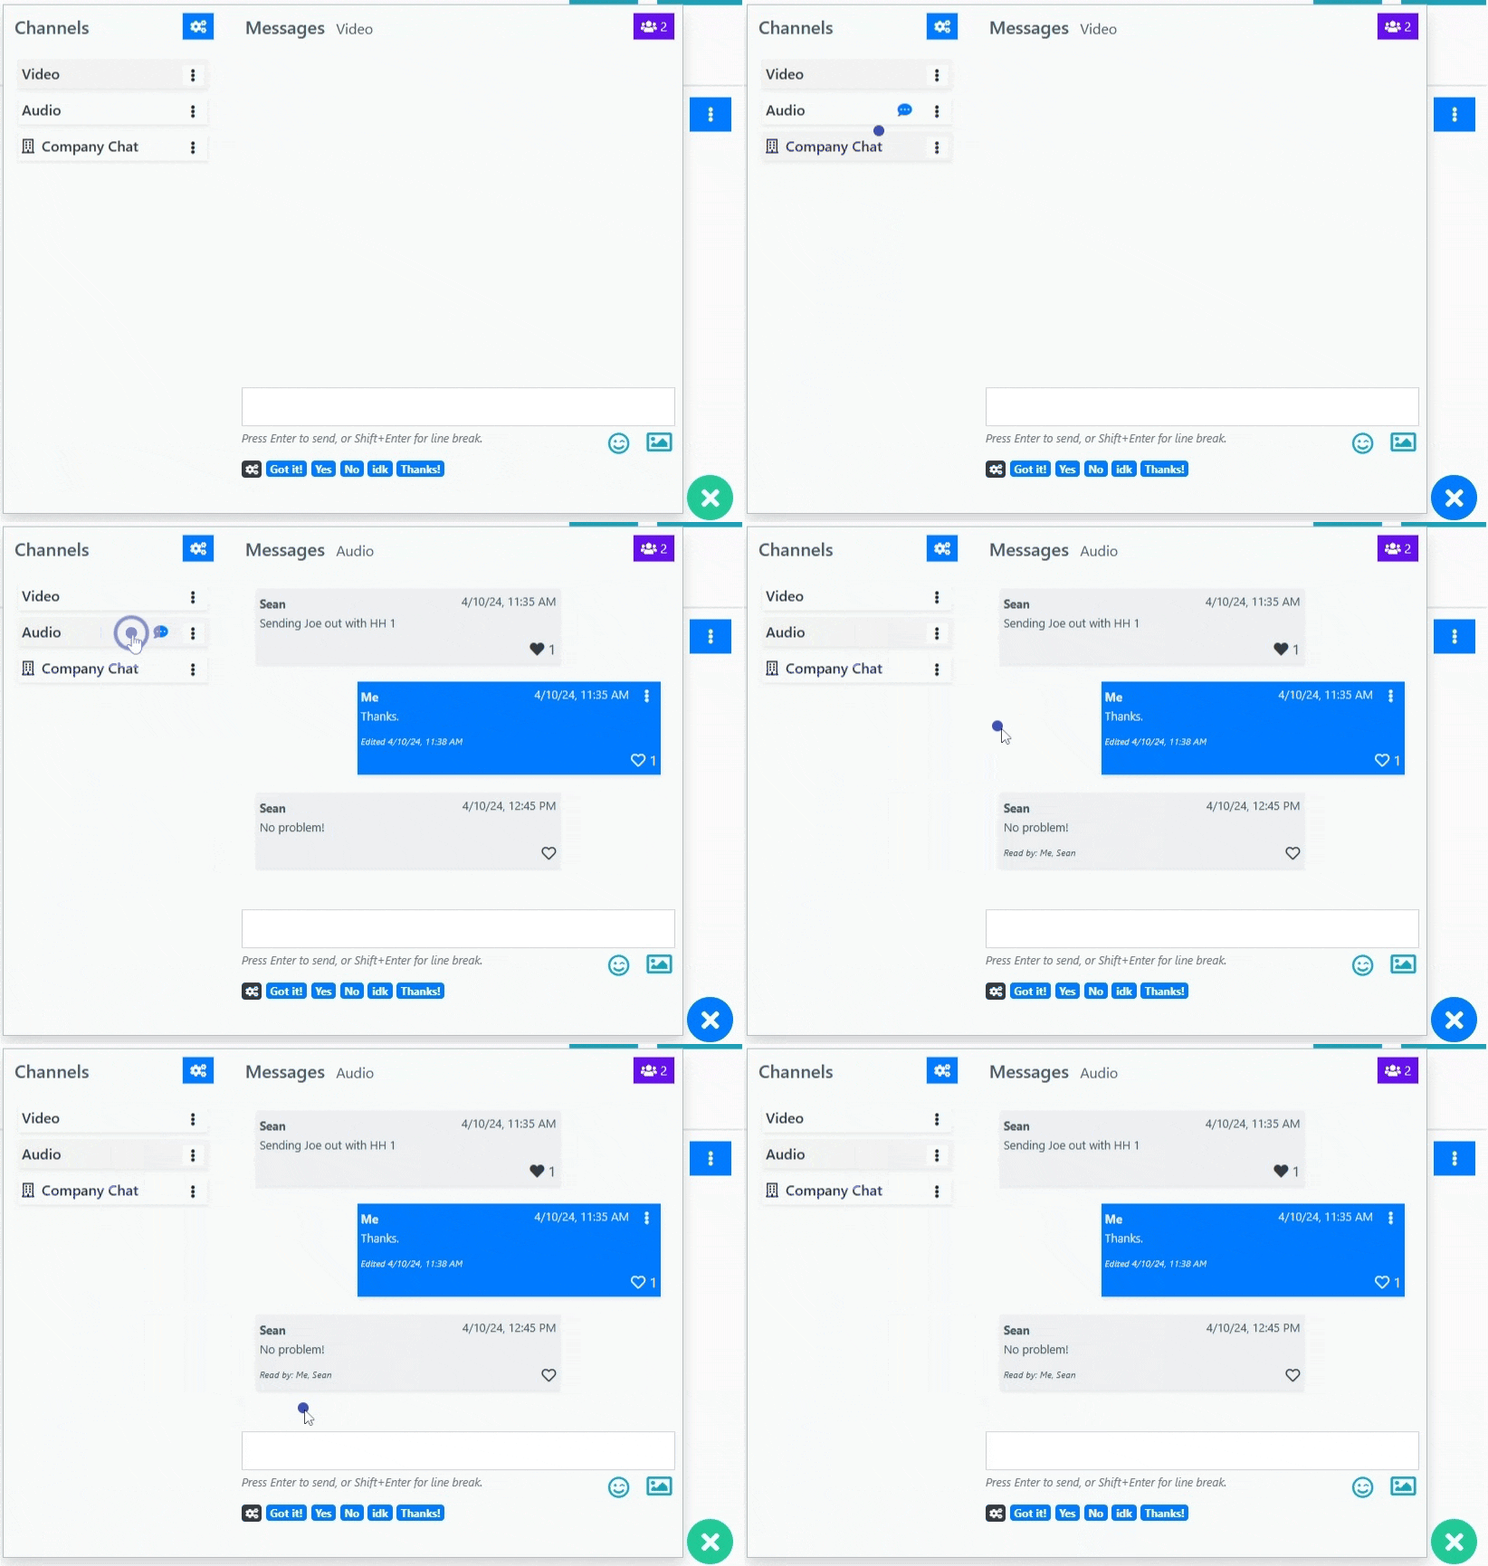
Chat will also alert you to new messages in channels you are not currently viewing. Just look for the blue chat bubble in the channels list. The teal chat bubble in the lower right corner of the screen will also turn blue when you have unread messages.
Saved Replies & Emojis #
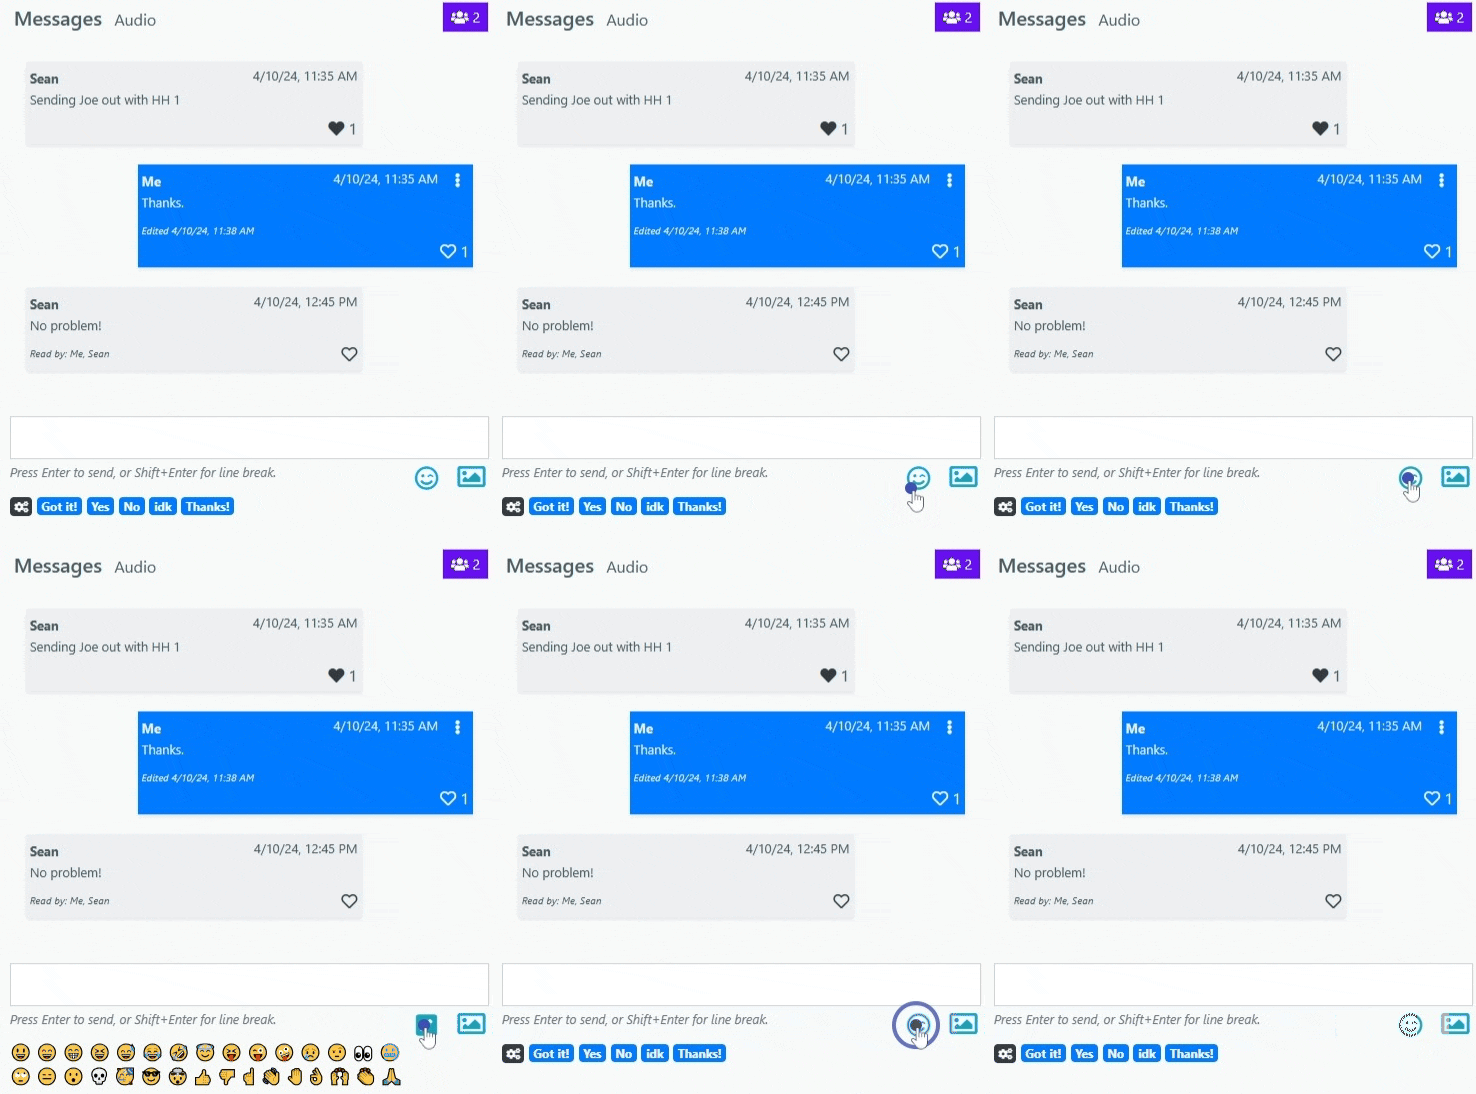
We also give you the ability to set and modify custom saved replies. Great for when you want to reply with a common phrase like “yes” or “no” and don’t have a lot of time to type out a response.
Saved replies are located just below the messages textbox and can be sent by clicking on one. Additionally, you can map up to 4 saved replies to the F9-F12 function keys on your keyboard.
Saved replies have a limit of 15 characters per reply and a maximum of 10 replies.
To edit saved replies, simply click the dark grey settings icon located to the left of the replies area.

You can also toggle between saved replies and emojis.
Attach Images #
Just under the messages textbox, you will find an image icon in the right corner next to the emoji toggle. You can click this to upload an image as a message. You can also add text before clicking on this as well if you want to add some context to the image.
Chat Options #
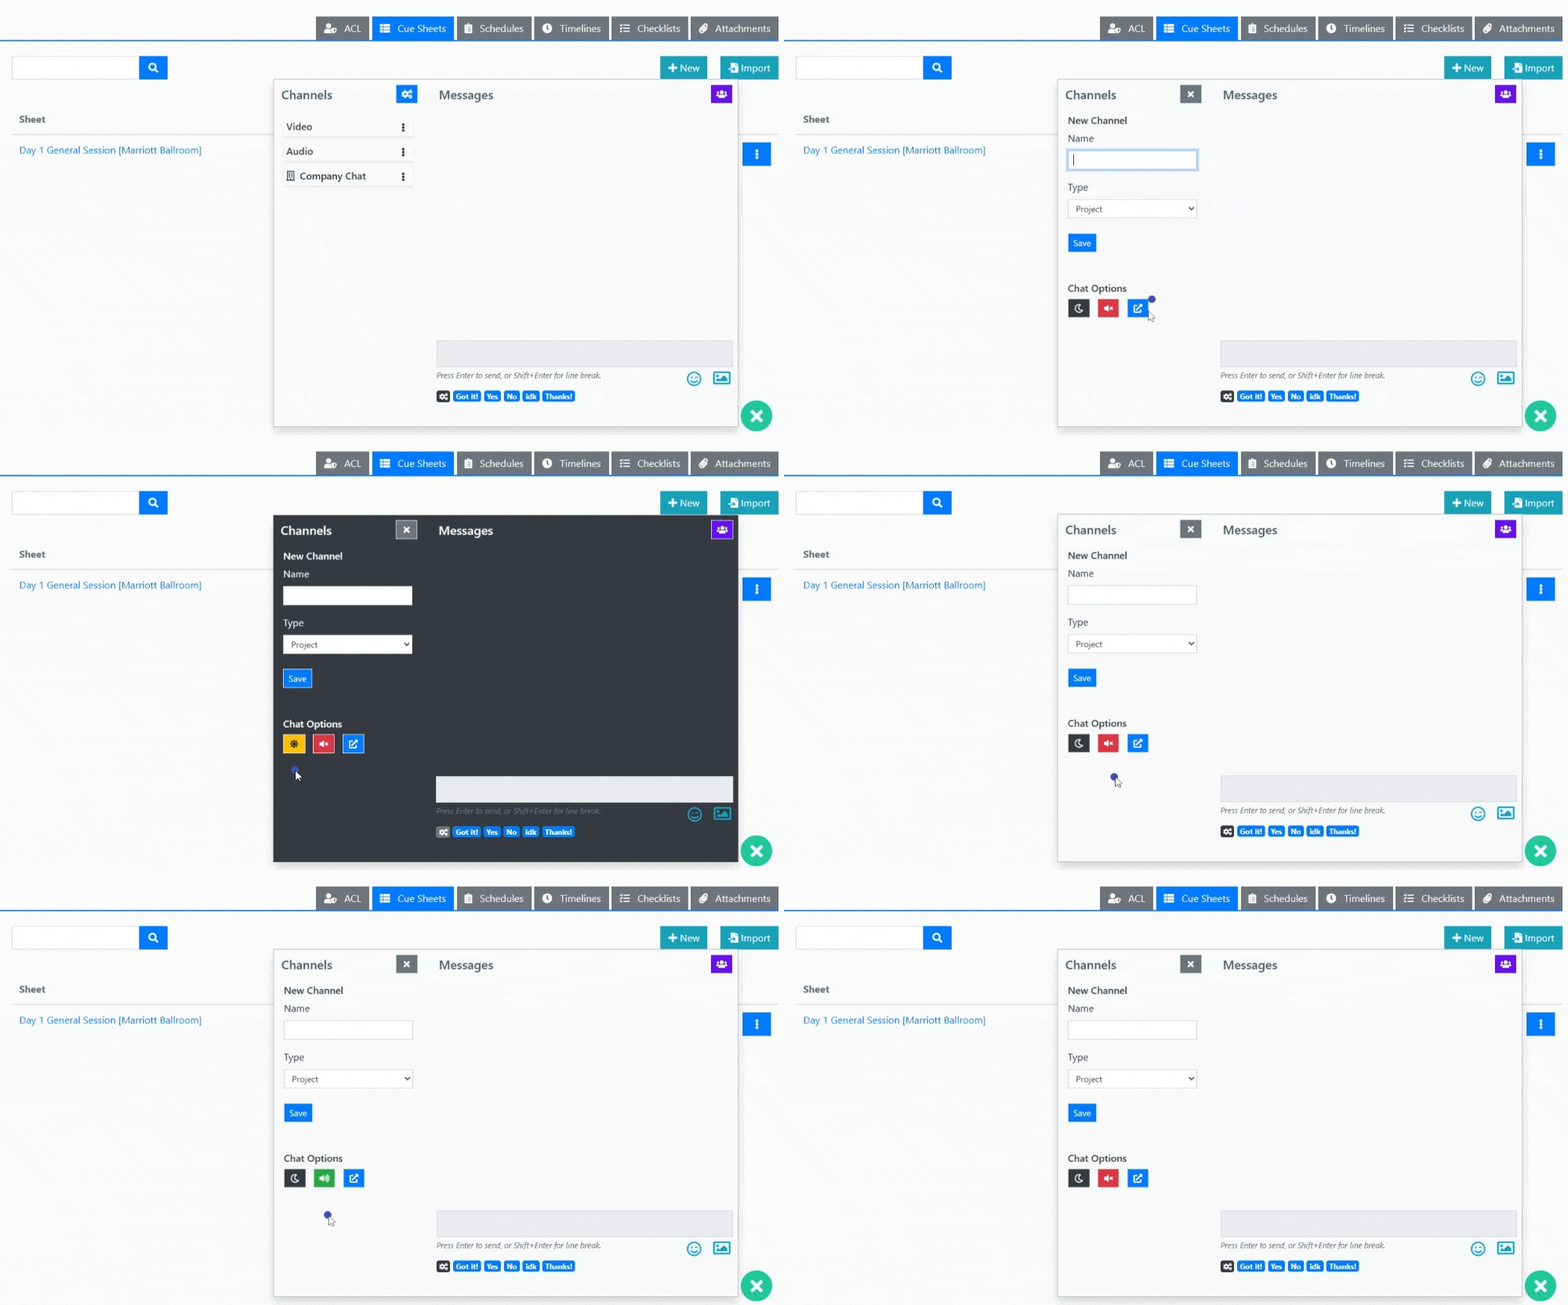
By clicking the blue settings button in the upper right corner of the channels pane, you can scroll down to find the following chat options:
- Light/Dark Mode
- Sounds On/Off (Sound effects when messages are sent and recieved)
- Fullscreen Chat
Docking in Cue Sheets View #
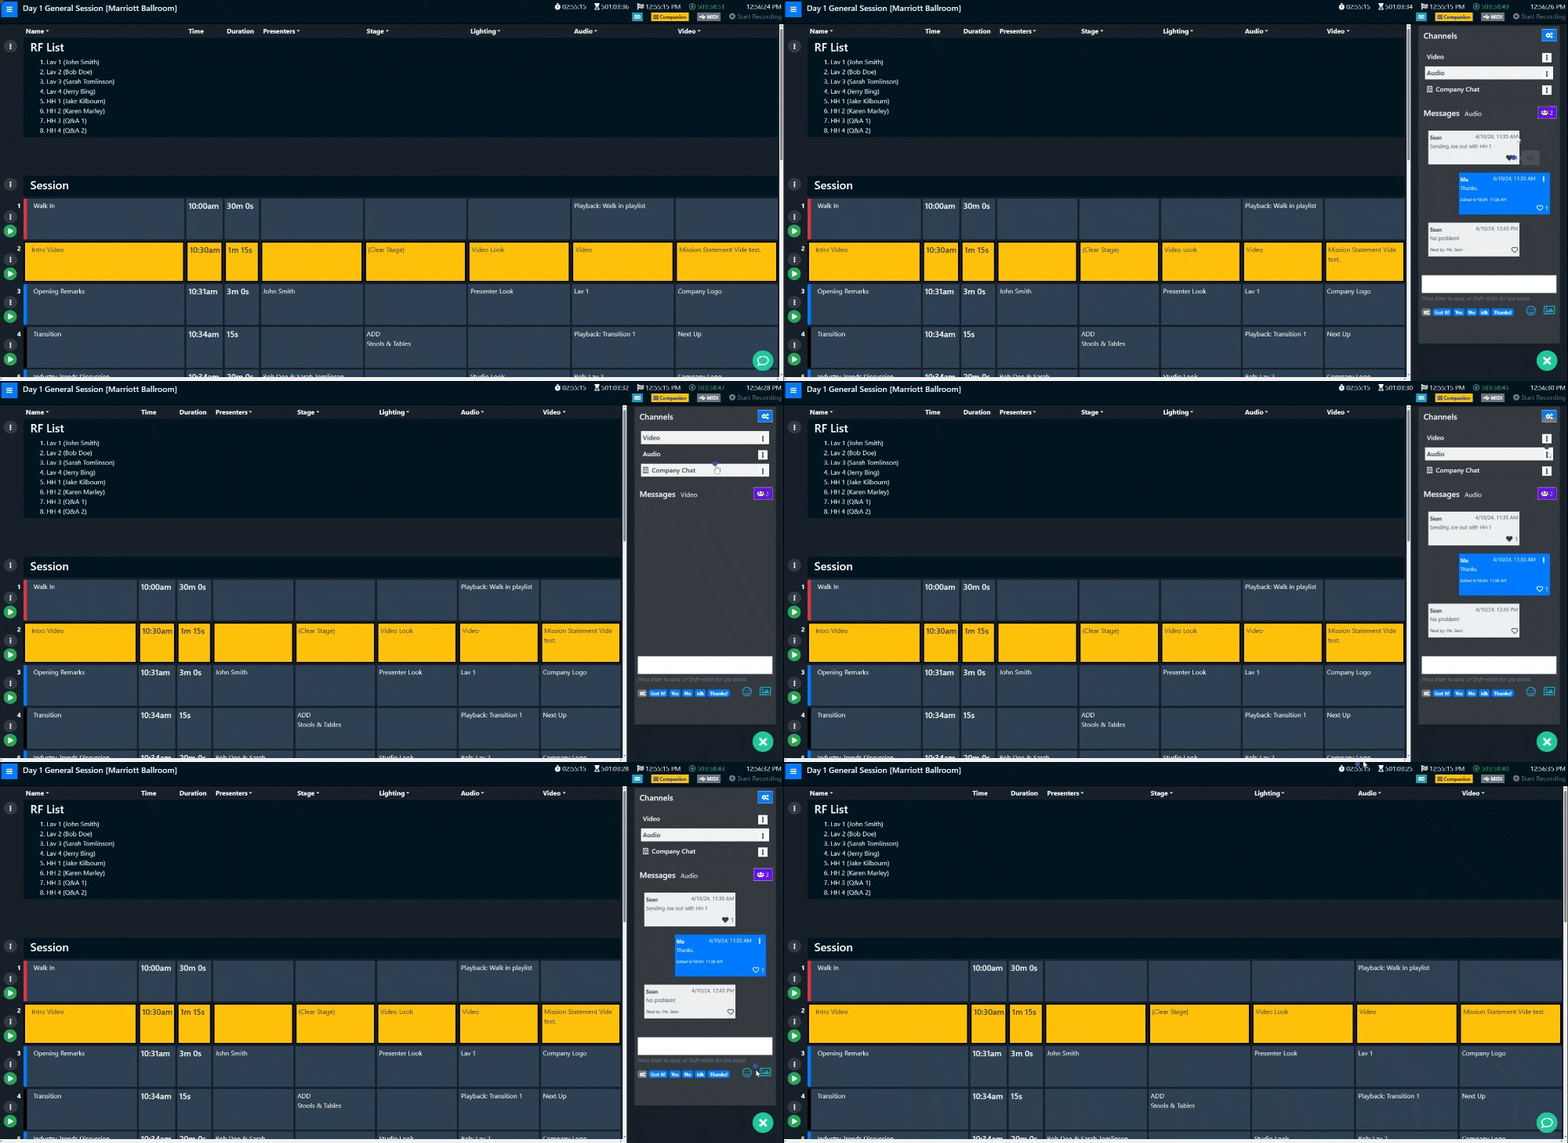
A cool feature of chat is that it automatically docks on the right side of the screen when viewing a cue sheet. This prevents chat from covering up important cues.
Email to All #
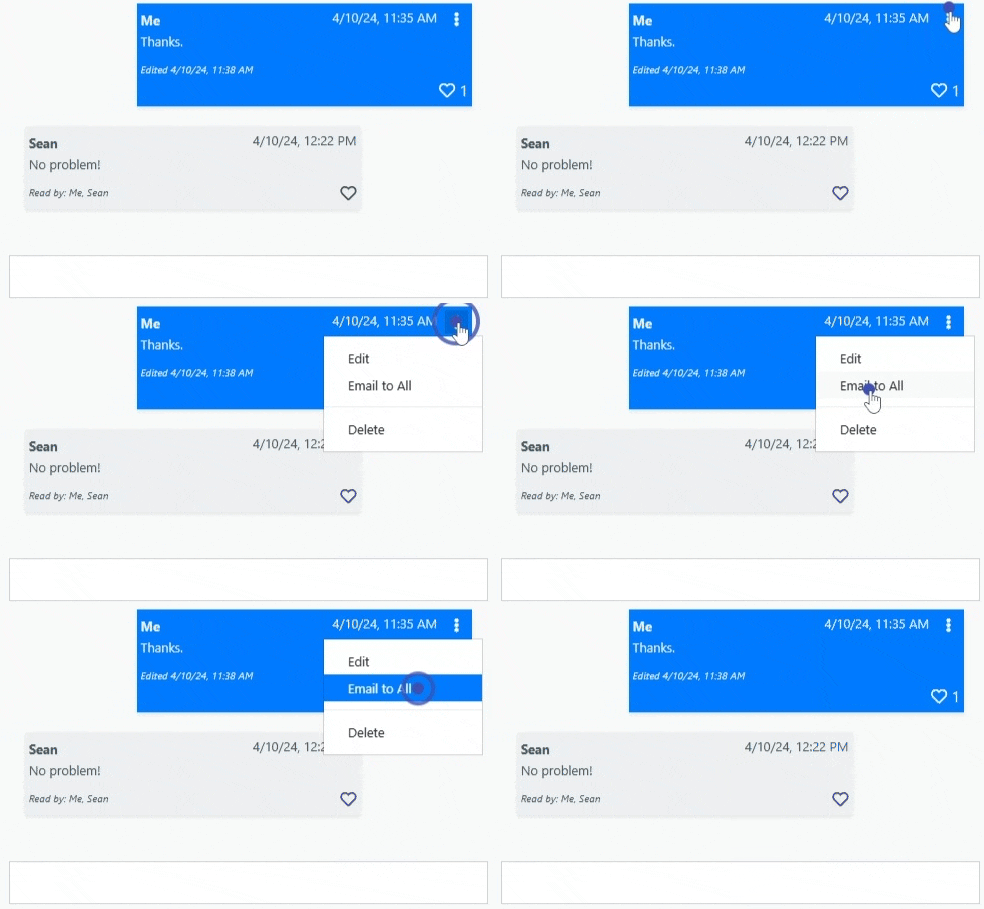
Another cool feature of chat is that you can create email blasts to all participants using the Email to All option in the message options dropdown. Great for if you want your crew to get a message while they are off-site or not online. Additionally, recipients that reply to the email thread will have their replies routed back into that chat channel as a message as long as they are still a channel participant.
